
AWS Lightsail offers a simple, cost-effective way to launch virtual private servers. In this guide, we’ll walk you through the process of installing WordPress on a Lightsail instance.
Prerequisites
- An AWS account
- Basic understanding of cloud computing
Step-by-Step Guide
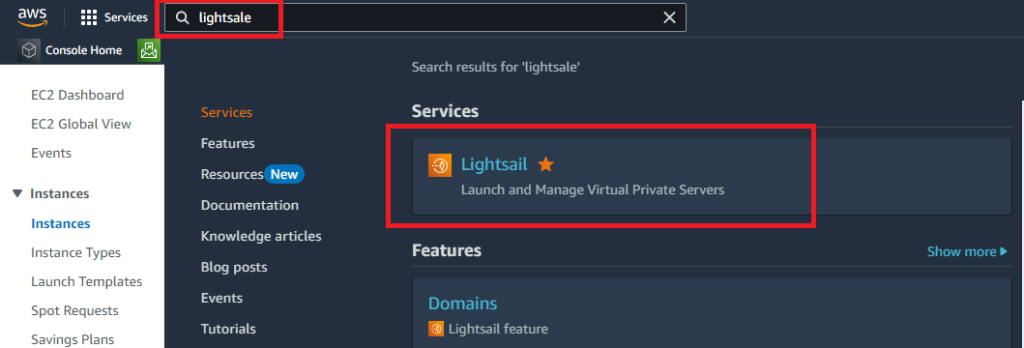
- Log in to AWS Lightsail: If you don’t have an AWS account yet, head over to https://aws.amazon.com/ to create one. Once you’re logged in, search for “Lightsail” in the search bar and select it, or navigate directly to https://aws.amazon.com/lightsail/.
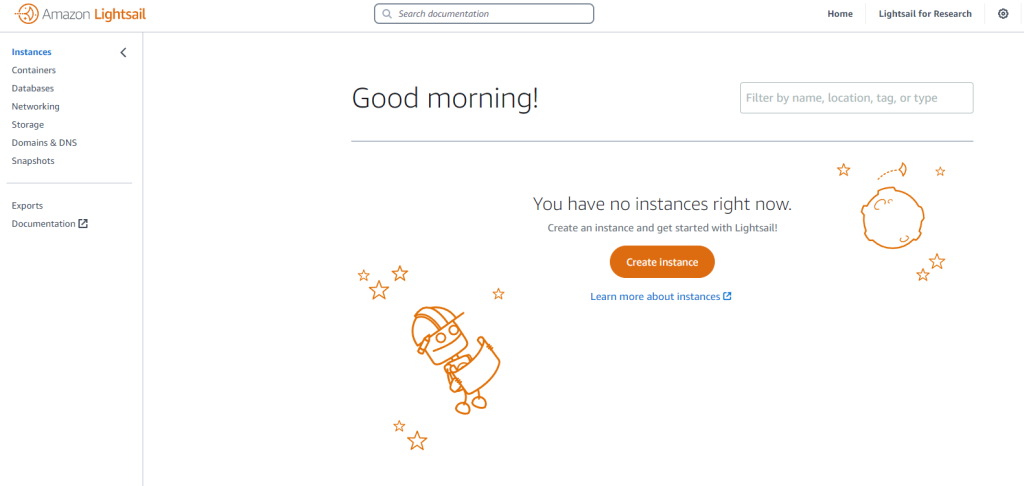
2. Create a New Instance
Click the “Create Instance” button to begin setting up your WordPress installation.
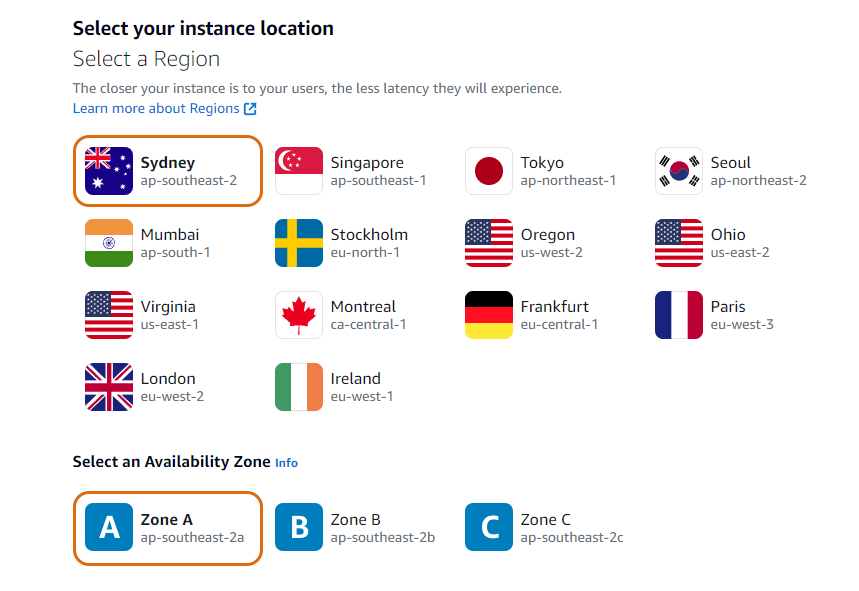
3. Choose Your Region and Availability Zone
Lightsail offers servers in various locations (Regions) with multiple data centers within each region (Availability Zones). Select the Region closest to your target audience for optimal performance. You can choose the default Availability Zone or explore different options within the chosen Region.
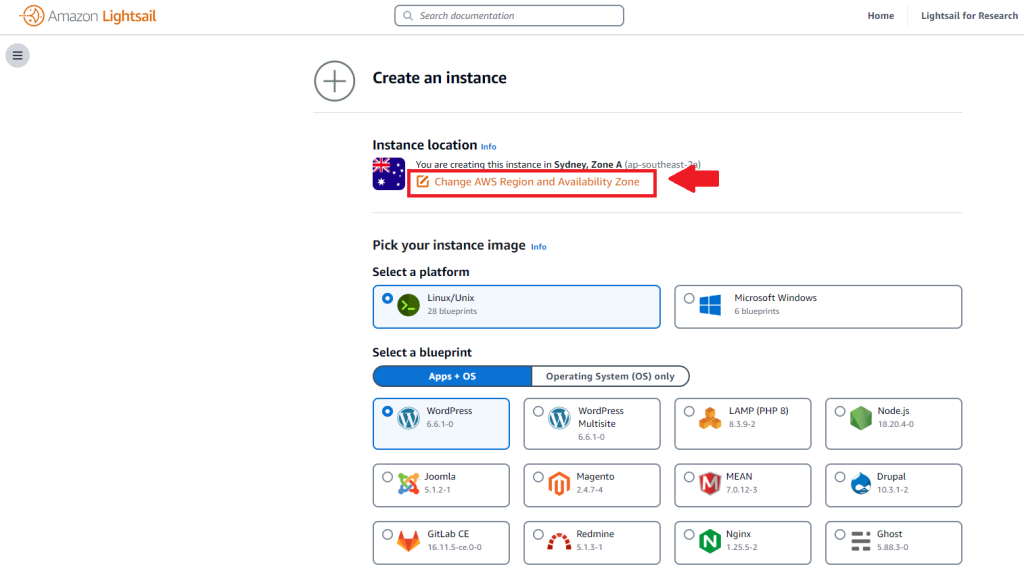
Click on “Change AWS Region and Availability Zone” to customise Regions and Zones.

3. Choose the Region and Zone:
4. Select Platform and Blueprint
Under “Pick your instance image,” make sure “Linux/Unix” is selected as the Platform. Then, in the “Select a Blueprint” section, choose “WordPress” for a pre-configured WordPress installation.
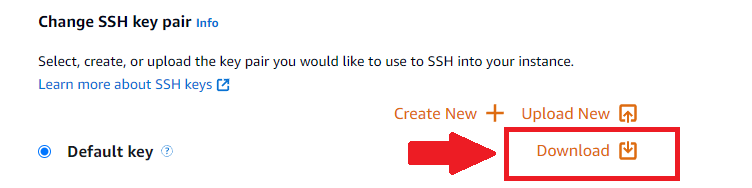
5. Download Your SSH Key Pair
Click “Change SSH Key Pair.” This allows you to download a key pair that will be used to securely connect to your WordPress server. Click “Download” to save the key pair as a .pem file. Important: Keep this file safe and confidential, as it grants access to your server.
Some tools like Putty require a .ppk format. If needed, use the PuttyGen tool to convert the downloaded .pem file to a .ppk file.
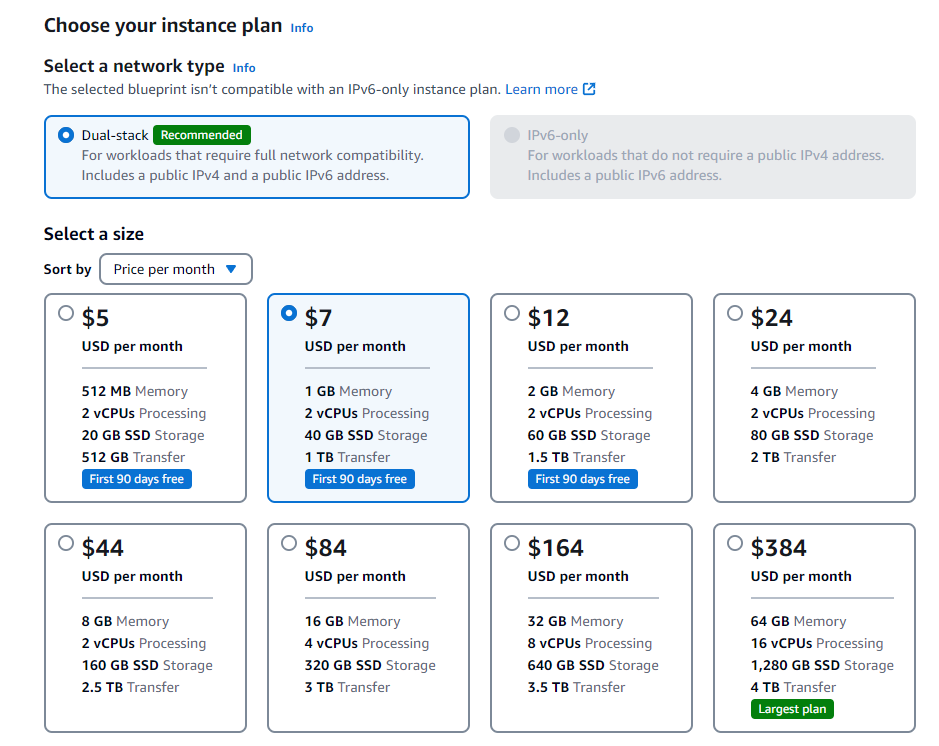
6. Select Network Type, Size, and Name
Leave the Network Type as the default “Dual-Stack.” Choose an appropriate instance size based on your website’s traffic needs. Lightsail offers plans with varying memory, CPU cores, storage, and transfer allowances.
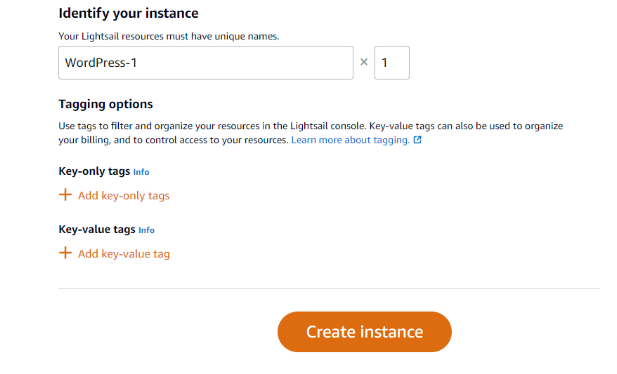
7. Give Instance a Name and Create Instance:
Finally, give your instance a unique name for easy identification. Once you’ve reviewed your configuration, click “Create Instance” to start the installation process.
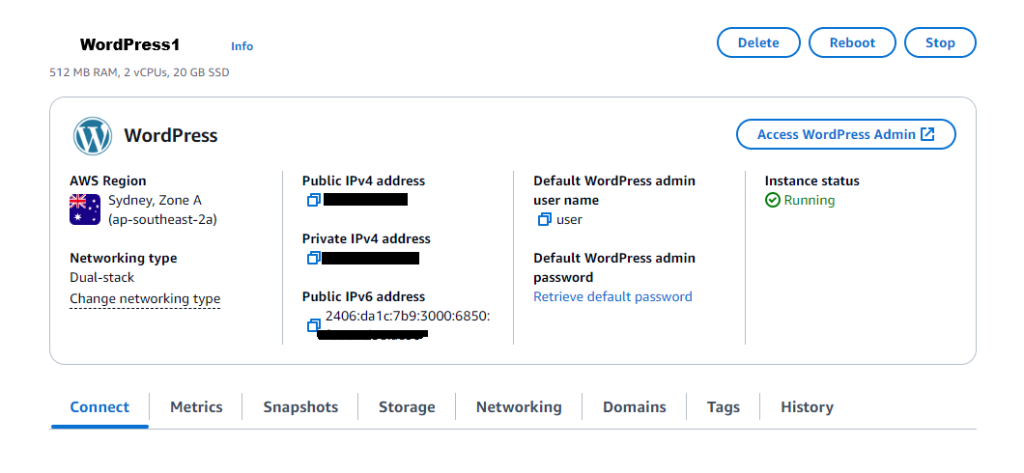
8. Access Your WordPress Admin
After successful creation, navigate to the “Instances” section and locate your WordPress instance.
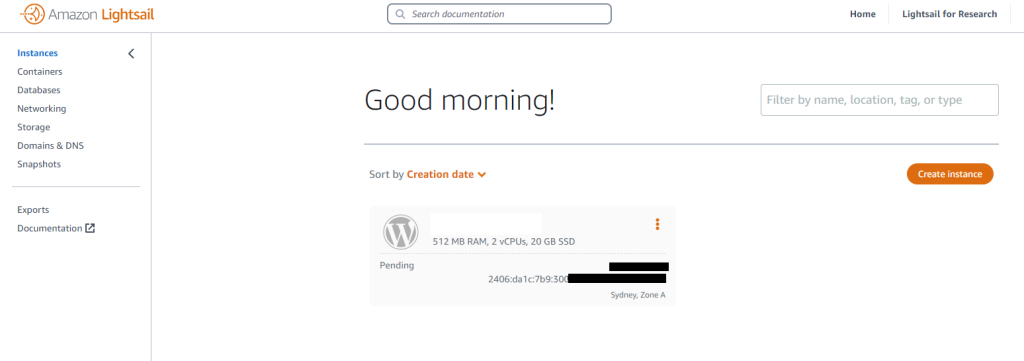
Click on the instance name to access its details.
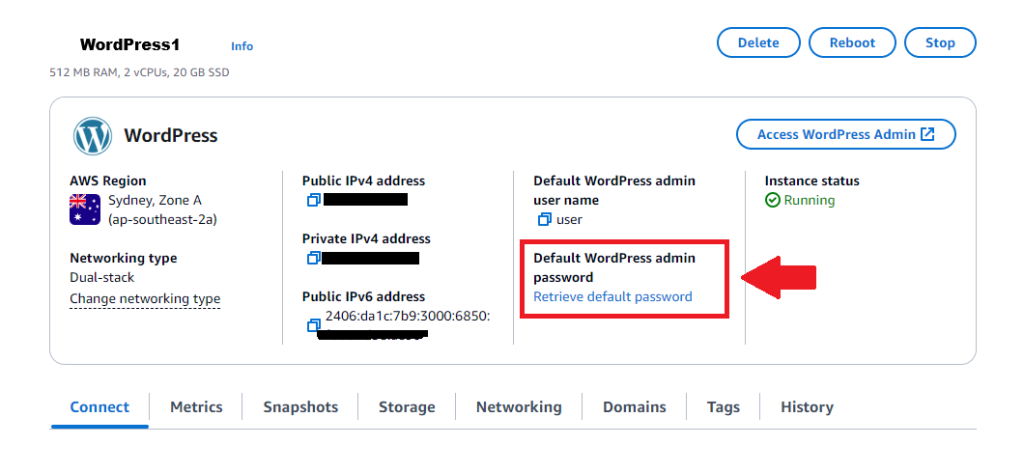
9. Retrieve Your WordPress Password
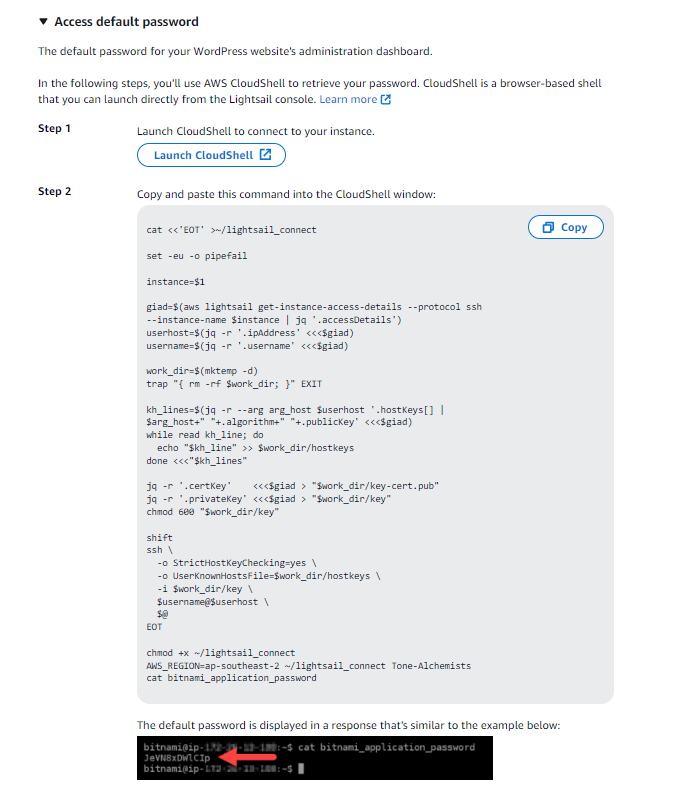
Click “Retrieve Default Password.” Lightsail will provide instructions on how to log in to your Linux server via SSH to retrieve the default WordPress password. Follow these instructions to secure your password.
Lightsail instructions to retrieve password.
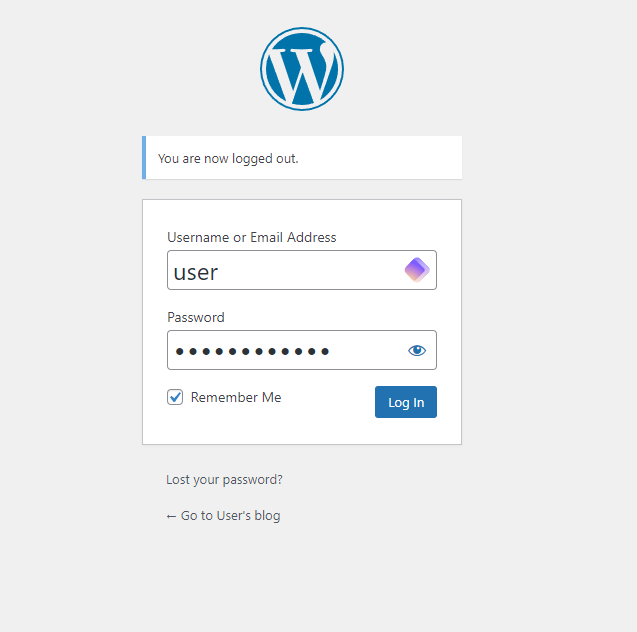
10. Login to WordPress Admin
Once you have the password, click “Access WordPress Admin.” This will display a popup window with your WordPress login details, including username (“user”) and password. The popup will also show the public IP address of your instance, which acts as the temporary URL for your WordPress site.
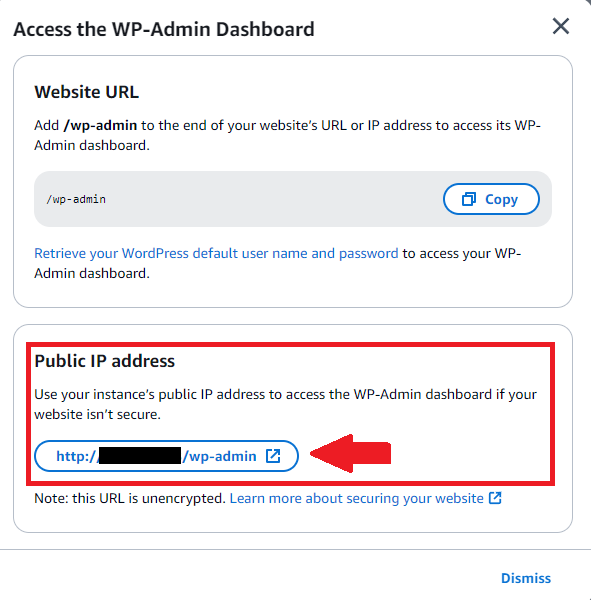
11. Manage Your WordPress Site
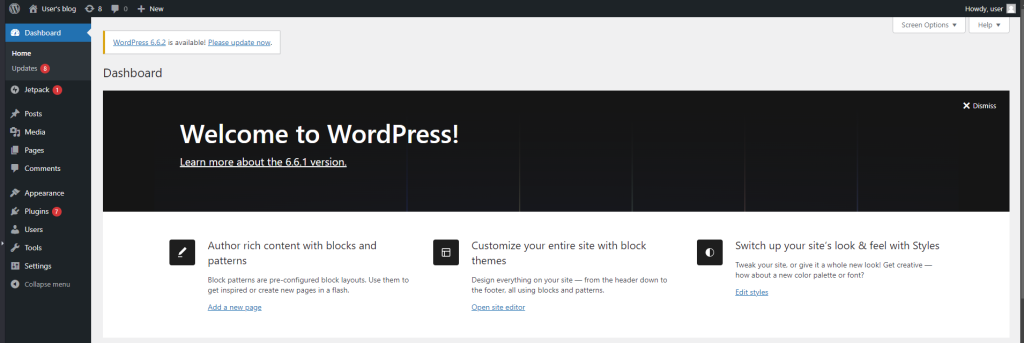
Click on the URL link in the public IP address section to access your WordPress login page. Enter the retrieved username and password to access the WordPress admin dashboard..
Congratulations! You’ve successfully installed WordPress and can now start building your website.
Next Steps:
This guide covered the basic setup. Consider connecting a custom domain name to your WordPress site for a more professional look and easier access.
Additional Tips:
- While creating your SSH key pair, Lightsail recommends selecting the “Provide a passphrase” option for an extra layer of security.
- Remember to update the default WordPress login credentials for enhanced security.
By following these steps and incorporating the recommended best practices, you’ll have a secure and functional WordPress website hosted on AWS Lightsail.
Leave a Reply