
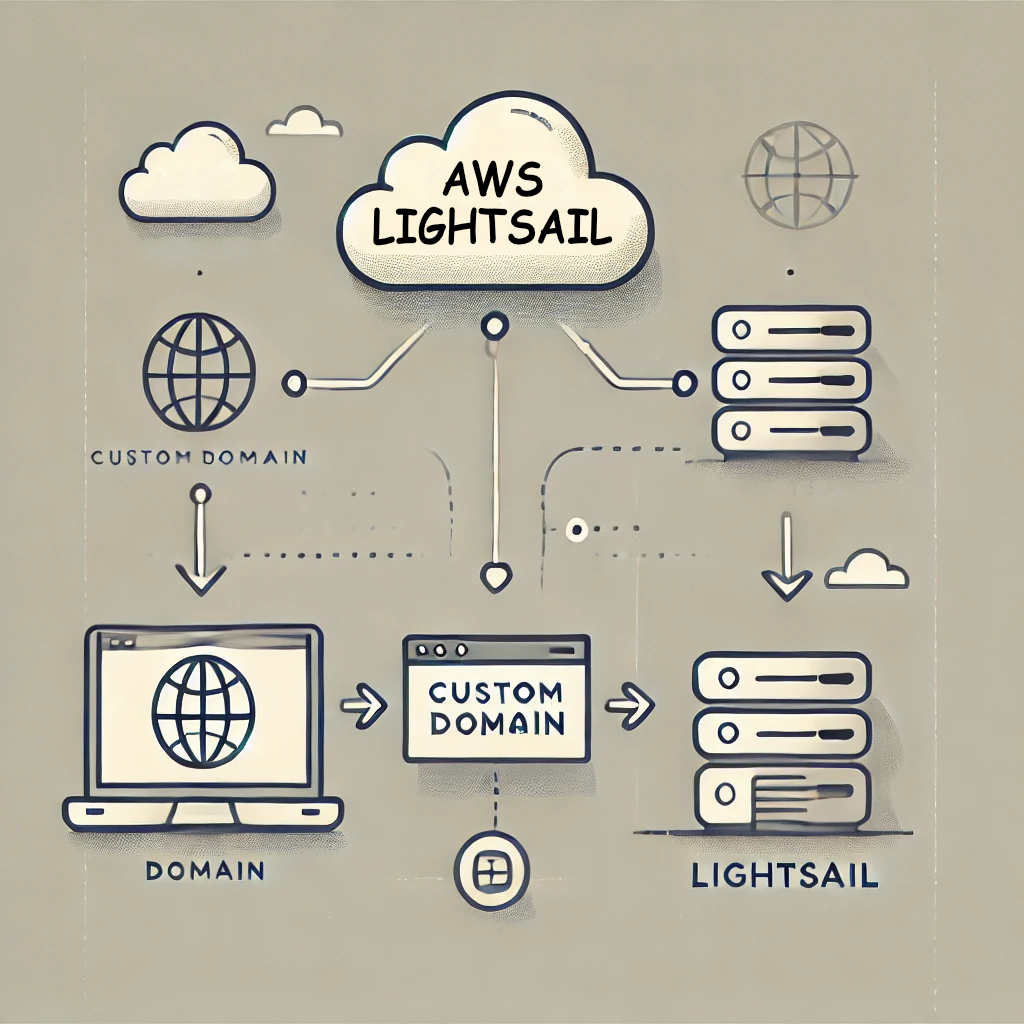
Want to give your Lightsail website a personalized touch? Adding a custom domain can make your online presence more professional and memorable.
This guide will walk you through the simple steps to connect your existing domain to your Lightsail instance.
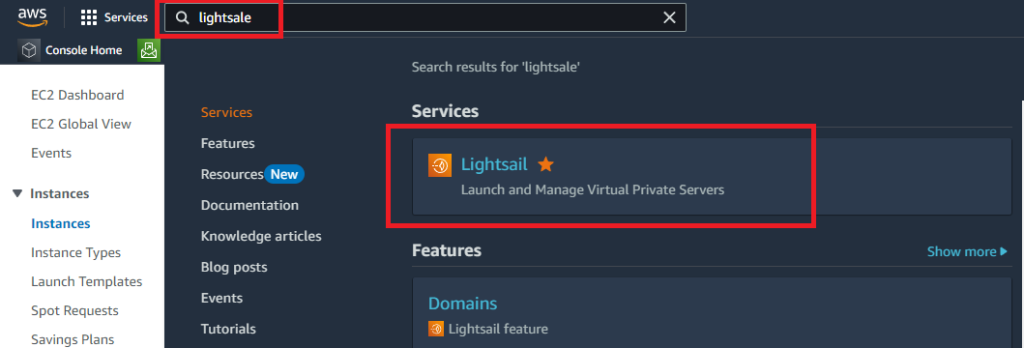
1. Log in to your AWS Lightsail console.
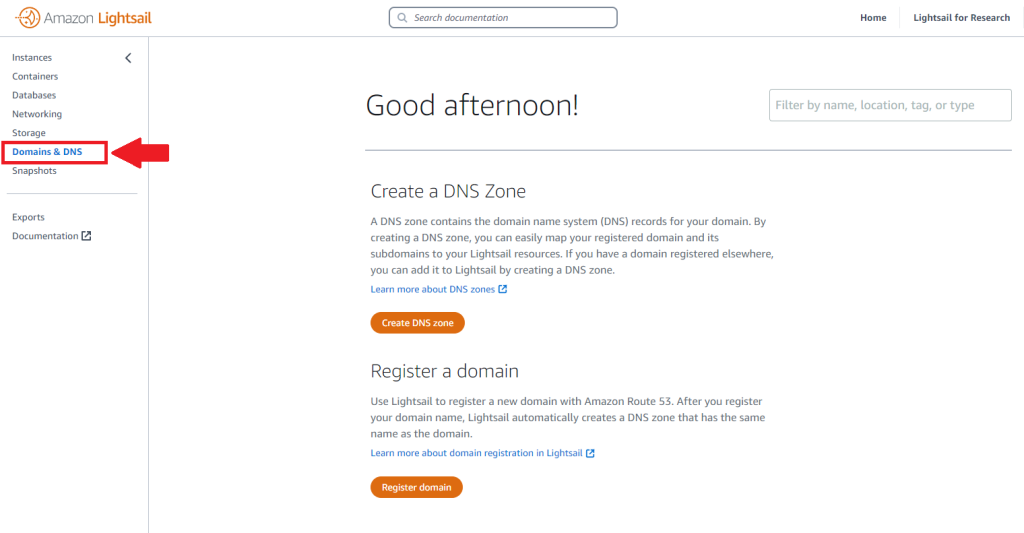
2. Navigate to the “Domains & DNS” section. This is typically located in the left-hand navigation panel.
3. Click on “Create DNS Zone.”

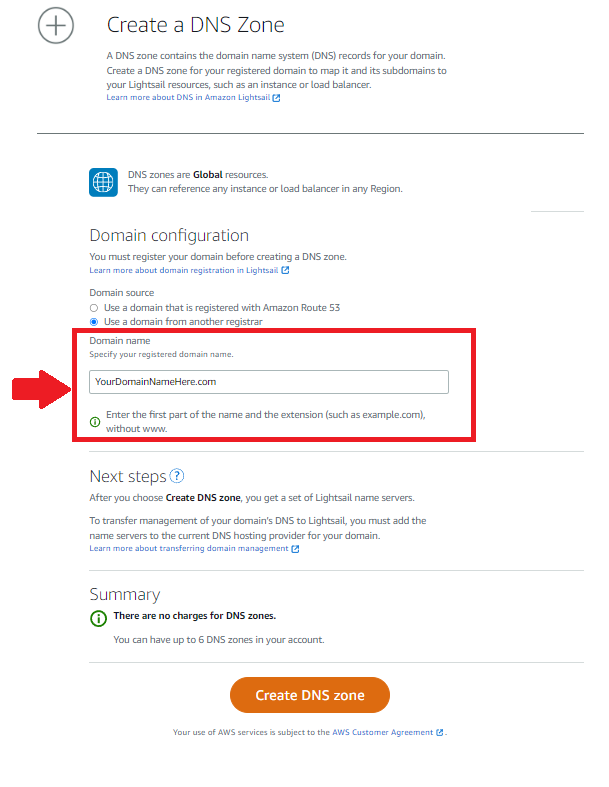
4. Select the “Use a domain from another register” option. This allows you to connect your existing domain to your Lightsail instance without transferring it to AWS.
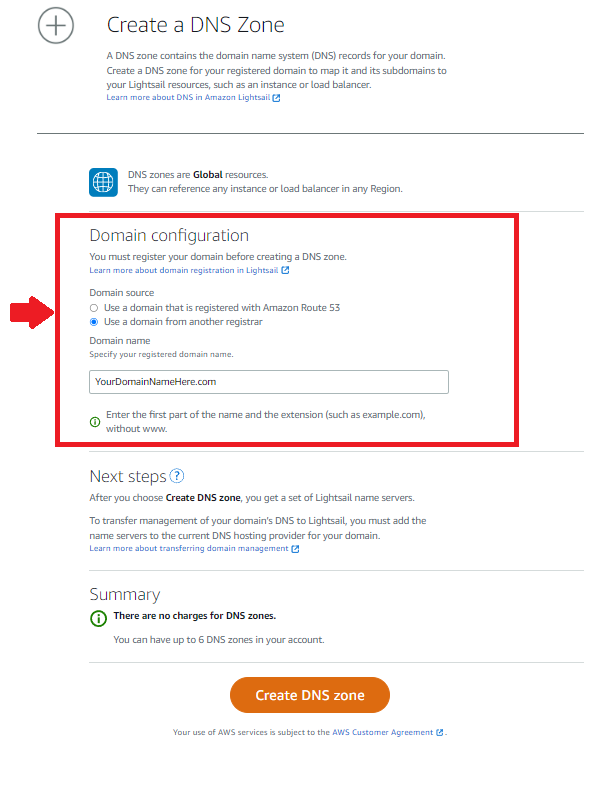
5. Enter the domain name you want to use.
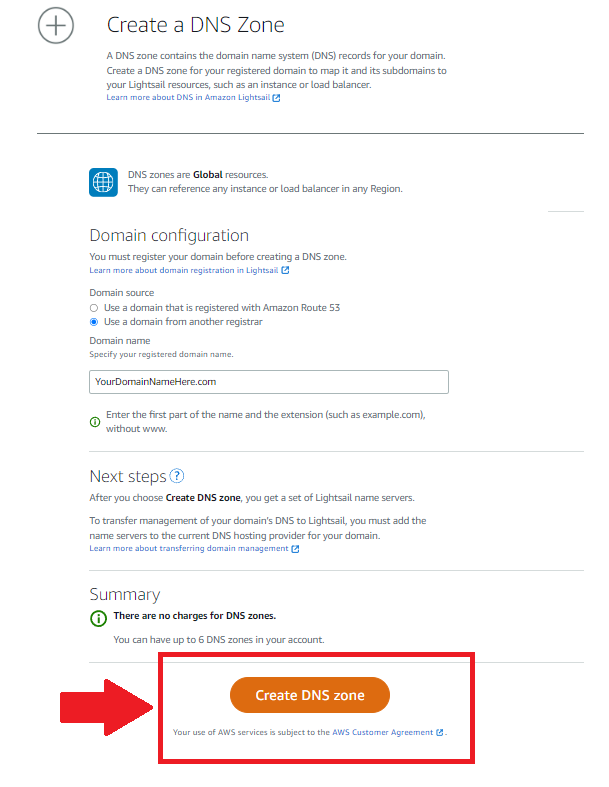
6. Click on “Create DNS Zone.”
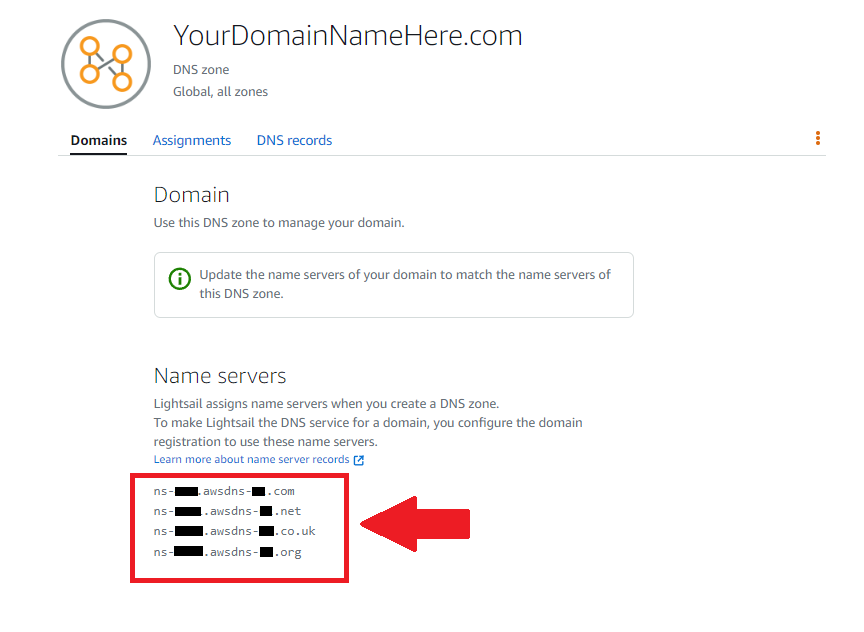
7. Copy the four name servers provided by Lightsail.
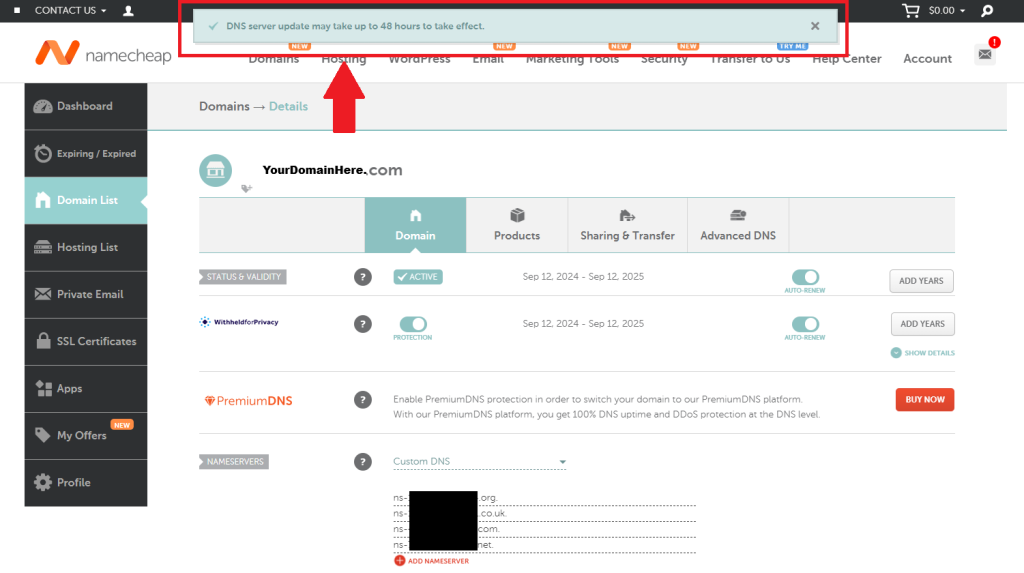
8. Log in to your domain registrar’s control panel and update the name servers for your domain to match the ones provided by Lightsail.
Here’s is an example from Namecheap Domain Register to showing you were to add the Nameservers. Also I have another post that shows you How to Redirect your NameCheap Domain to AWS Route 53.

9. Wait for the DNS changes to propagate. This may take a few hours.
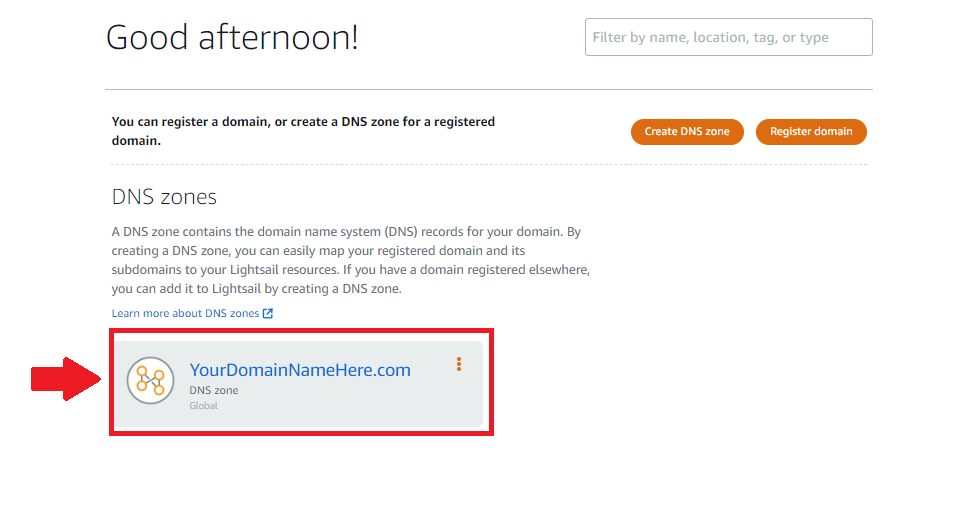
10. In your Lightsail console, navigate to the “Domains & DNS” section and select the DNS zone you created.
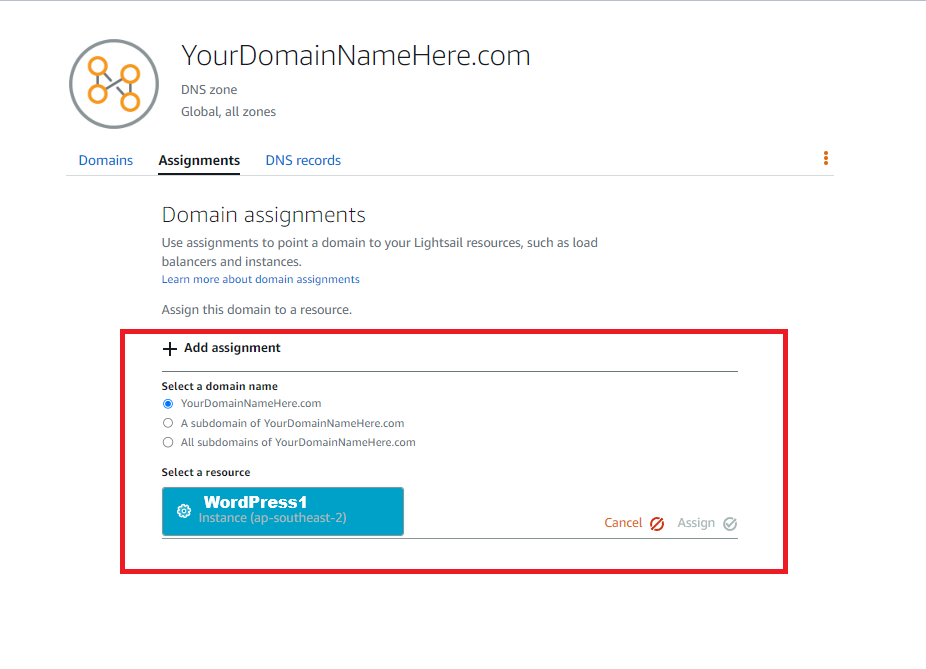
11. Click on the “Assignments” tab.
- Select the Lightsail instance you want to associate with the domain.
- Click on “Assign.”
12. Verify that your domain is resolving correctly by visiting its URL in a web browser.
Conclusion
By following these steps, you’ve successfully connected your custom domain to your Lightsail website. Now, visitors can access your site using your personalized domain name. Enjoy the benefits of a professional online presence!
Leave a Reply