This a quick guide to how to login into your aws ec2 or lightsail instance with PuTTy.
Prerequisite:
- Download and install PuTTY ( https://www.putty.org
- Ensure your have a .PPK key saved on your Desktop (or another known location)
Step-by-Step Guide:
Step 1: Open PuTTY
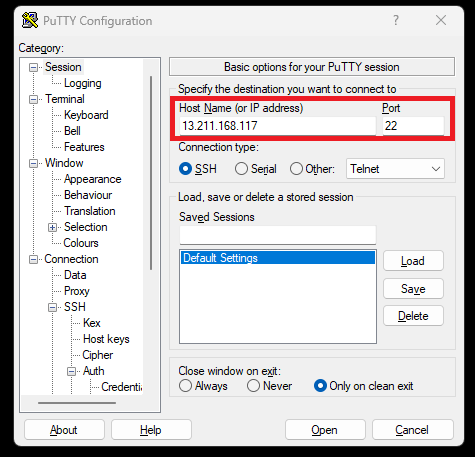
In the “Session” section, under “Host Name (or IP Address)”, enter your AWS EC2 or Lightsail instance’s Public IP address.
Keep the port set to 22 (the default for SSH).
Step 2: Save Session for Future Logins
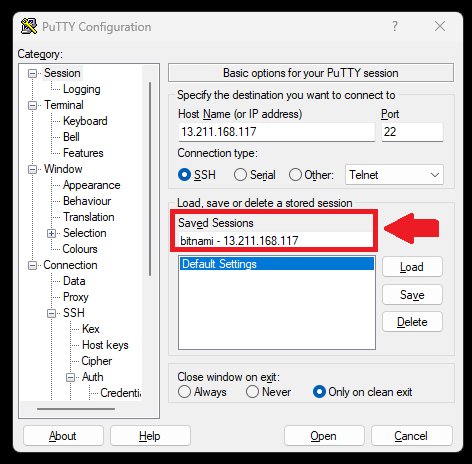
In the “Session” section, you can save your settings so you don’t need to retype them next time.
Under “Saved Sessions”, type a recognizable name, such as “bitnami – 13.211.168.117” (where bitnami is the username and 13.211.168.117 is the public IP address of your instance).
Click “Save” to store your session settings.
Step 3: Load and Save Credentials
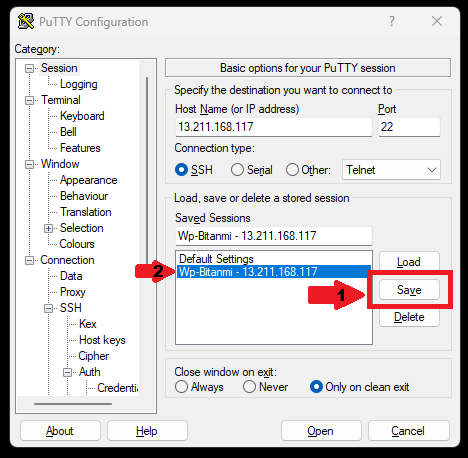
Save your new session by clicking the Save button (under the “Session” section). You’ll now see your session under the saved list. Highlight it and select Load whenever you need to log in again.
Step 4: Add SSH Authentication Credentials
To connect to your AWS instance, you need to add your .PPK private key.
Navigate to the “Connection” section → “SSH” → “Auth”→ “Credentials”.
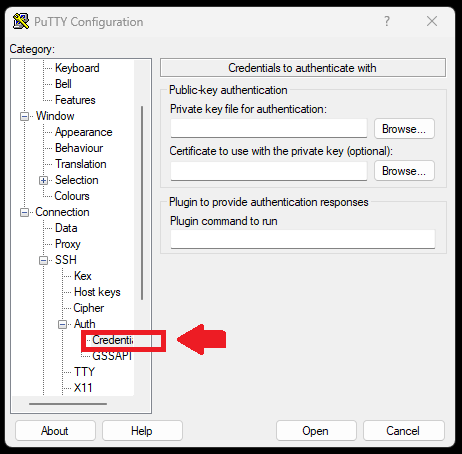
Under “Private Key file for authentication”, click Browse to locate and select your .PPK file. This is the key either downloaded from AWS or converted from a .PEM using PuTTYgen.
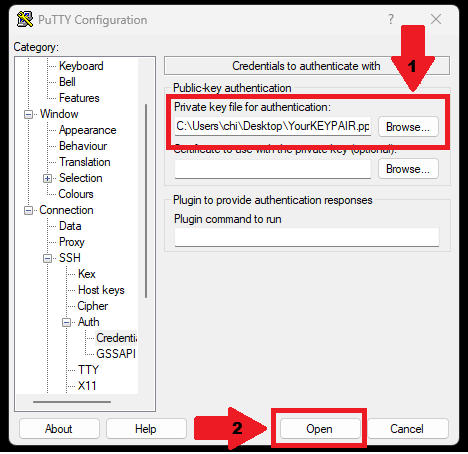
Step 5: Save Session Again
After adding the .PPK file, return to the “Session” section and save your settings again (as you did in Step 3). This ensures you won’t need to re-add the key each time.

Click Open to start the SSH login. The first time, PuTTY will show a “Security Alert” asking you to confirm the host key. Click Accept to proceed and connect to your instance.
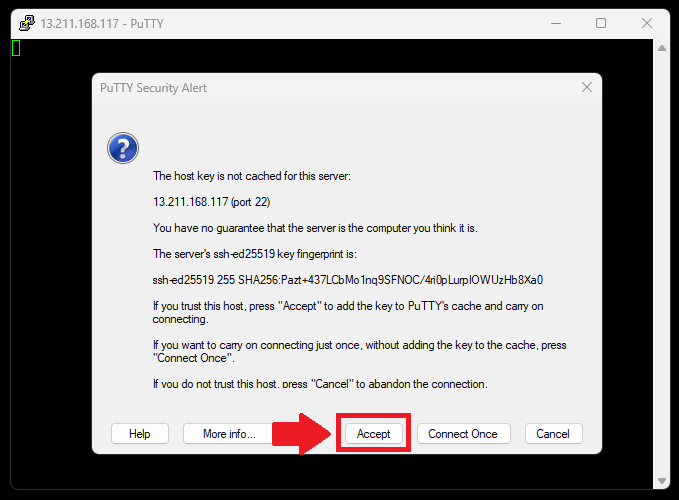
Step 7: Enter Username
Once the terminal window opens, you’ll see “Login as:”.
Enter the login username for your instance. This could be “user” or something else. In our example, it’s “bitnami”.
Press Enter to log in to your AWS instance.
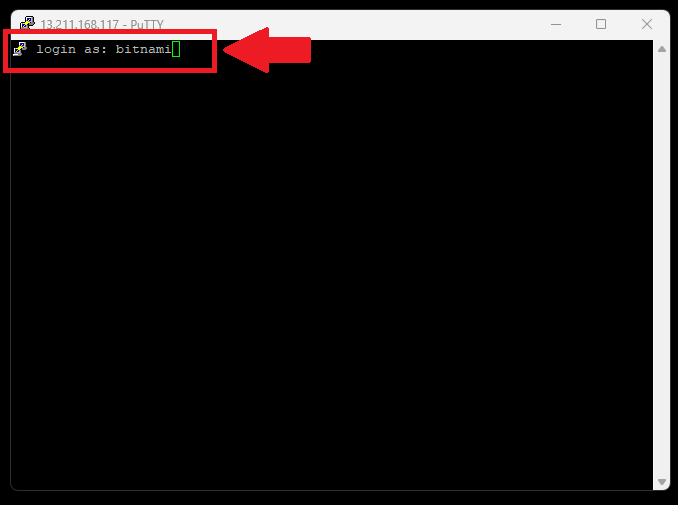
Step 8: Success!
You will now see the command prompt for your AWS instance, indicating a successful login.
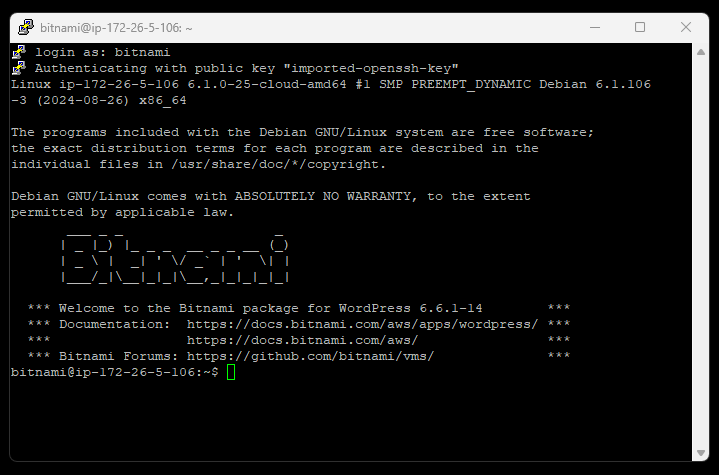
Optional Advance Settings.
To streamline your login process even further, consider these optional settings: These are optional settings will save you time in login to your AWS instance without having to type in they username each time, getting timed out of the aws instance, elevate your user privilege to admin (sudo su)
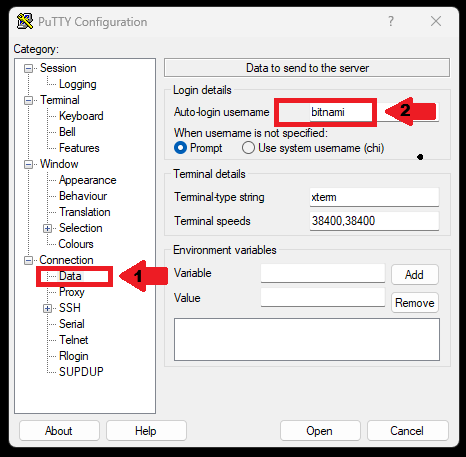
Go to the “Connection” section → “Data” → “Auto-login username”.
Enter your username (e.g., “bitnami”). This automatically inputs your username at login.
Keep SSH Session Active:
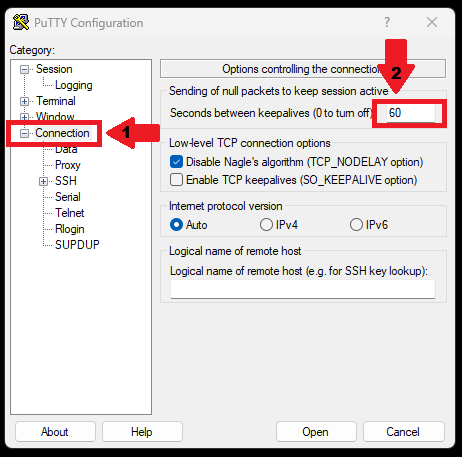
To avoid timeouts during your session, navigate to the “Connection” section → “Sending of null packets to keep session active”. In “Seconds between keepalives”, enter 60 seconds to keep the session active.
Elevate Privileges on Login:
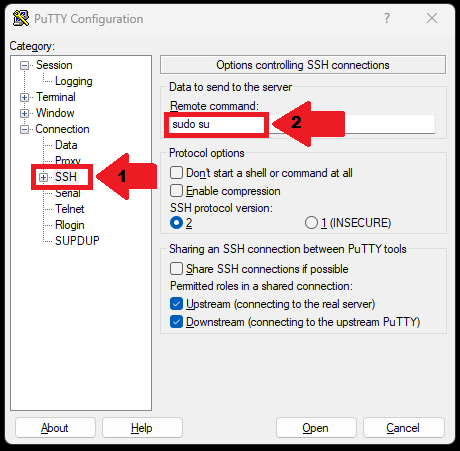
If you need administrative privileges, go to “Connection” → “SSH” → “Remote command” and type “sudo su”.
This will automatically elevate your session to admin access upon login.
Save Settings:
Don’t forget to save these settings again in the “Session” section, as outlined in Step 3.
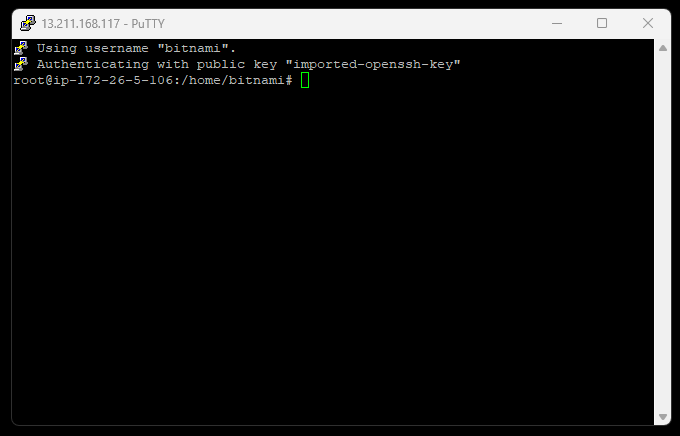
After you saved your settings click on open session and by apply these advance settings now you’re wont have to type in your username login, elevate your privileged to admin and won’t get time out of the ssh session.
Extra Notes:
- Security Tip: Consider using a passphrase for your private key to add another layer of security when logging in.
- Backup: Always keep a secure backup of your .PPK and .PEM keys.
Conclusion:
By following this guide, you’ve successfully connected to your AWS EC2 or Lightsail instance using PuTTY. You’ve also learned how to streamline future logins by saving your credentials and applying advanced settings. With these steps, your SSH login process will be much smoother and faster.


Leave a Reply